Goal Setting Manual

Using GoalTrak

Help Index

Glossary

|
GoalTrak PV - Help with Goals
|
My Goals |
| |
Clicking on the My Goals link will display a list of your goals in the various stages of development.
Clicking on the goal phrase of a Published and Active goal (one you have committed to) will display all the goal's data in a view only format. Clicking on a goal phrase of a goal that has not been completed yet, will display the goal's data and allow you to continue creating your goal.
|
|
Viewing a Published/Active Goal |
| |
When viewing a goal, there are five additional links available to you:
- Revise Goal
- Print Goal
- Annotations
- Export Goal
- Delete Goal
With the exception of the Revise Goal link These links function the same as the ones that were available to you while you were creating your goal.
Revise Goal - During the course of accomplishing a goal, it sometimes becomes apparent that a goal needs to be revised. This can happen when the assumptions made during the creation of the goal are no longer valid. In cases like these, accomplishing the goal becomes impractical and the goal needs to be revised to reflect these unforeseen circumstances. Sometimes a revision is used for simply extending the deadline for accomplishing the goal. In some cases, new criteria and new targets and expectations are needed. If the amount of revision needed to make the goal relevant seems to be extreme, you may want to delete the goal instead, and then create a new goal which more properly relects the new paradigm that you are facing.
To revise a goal, click on the Revise Goal link. This releases the goal from Results Management and allows the you to make the revisions necessary. When all the revisions are made, you will have to re-committ to accomplishing the goal. The goal will once again be available in Results Management.
Print Goal - Click on the Print Goal link if you want a printer friendly page to print out all the information for a goal. The printer friendly data will be displayed in a pop up window. Click on the Print This Page icon/link to send the goal data to the printer.
Annotations - If you want to add some information to your goal that is not related to the nine steps, use the Annotations field. To view previous annotations and enter new ones, click on the Annotations link to pop up the Annotations window. At the bottom of the window, you will see all the annotations that you have made and when it was posted. Add a new annotation by typing it into the text area at the top of the Annotations window and then click on the Submit this Annotation button to post it.
Export Goal - If you would like to export your goal's data to another program, click on the Export Goal link to create a goal file in a "comma separted values" (csv) format. You can then import this file into Microsoft Excel® or any other program that accepts the csv format.
Delete Goal - During the course of accomplishing a goal, it sometimes becomes apparent that a goal is no longer relevant and needs to be deleted. This can happen when there are major changes that occur after a goal is published and becomes active.
To delete a goal, click on the Delete Goal link. This will remove the goal from your list.
|
| Managing your Goal's To Do List |
| |
During the course of working to complete your goal, you can make additions and changes to your To Do List while viewing your goal. To add a new action step, click on the Add button below your list of To Do Action Steps to bring up the Action Step Data Entry window. Enter in the Action Step, the date it is due and the initials of who is responsible for it. Click on the Save button to add the step to your list. To edit an action step, first click on the action step in the list and then click on the Edit button. This will pop up the Action Step Data Entry window displaying the action step. Make the necessary changes and click on the Save Changes button to record the changes. To delete an action step, first click on the action step in the list and then click on the Delete button. This will pop up the Action Step Data Entry window displaying the action step in a view-only grid. Review the action step and click on the Delete button to remove the action step from the list.
You can print a copy of your To Do List by clicking on the Display/Print To Do List link. This will bring up the To Do List in a pop up window. Click on the "Print To Do List" icon to print the list.
|
| Viewing Criteria Data and Results |
| |
While viewing a goal, you can also view the targets and Actual Performance results to date for each criterion. By default, the data and results for the primary criterion will be displayed. To view the data and results for a different criterion, click on a criterion in the list. The page will refresh showing the data and results of the new criterion.
|
|
Create a New Goal |
| |
Click on Create a New Goal link to start creating a new goal. Before you can start creating your masterpiece, there is some required information you must supply GoalTrak PV:
- Start Date
- Target Date
- Goal Phrase
- Key Result Area
- Parent Goal (Optional)
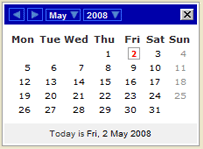
Start Date - The Start Date of a goal is typically the day you begin to create your goal. It can be a date in the past or the fututre. Select the Start Date from the "Start Date" date picker.
A snapshot of the date picker.
Target Date - The Target Date of a goal is that day in the future by which you want the goal to be accomplished. Select the Target Date from the "Target Date" date picker.
Goal Phrase - The Goal Phrase is a short descriptive sentence that is the title of the Goal. Example: "2010 Weight Control and Fitness"
Key Result Area - Every goal must belong to one of the Key Result Areas. There are two types of Key Result Areas: Business and Personal. To view the definitions of these Key Result Areas click on the Key Result Area link next to the dropdown box that contains the Key Result Area choices. Use the drop down box to select the Key Result Area for your new goal.
Parent Goal - If this new goal is supporting an existing goal, then select that goal as the Parent Goal from the drop down box. Only Published/Active goals can be parent goals. This field is optional.
With all the required information entered, click on the Save Required Information button. Your new goal will be recorded and you will be taken to a page where you can continue creating the rest of the goal and commit to achieving it.
|
|
Continue Creating a Goal |
| |
With the required information out of the way, it is now time to focus on creating the rest of the goal, beginning with Crystallization. GoalTrak PV uses a powerful nine step process virtually guaranteed to help you write a goal that will give you the results you want. The 9 Steps are:
Before you continue creating your goal, we recommend that you read the help under each link above to understand why each of the nine steps is an important part of the goal setting process. Short cutting any of the steps will lead to poorer performance. While you are creating your goal, you will find "What is...? and "How Do I...? links for each of the steps along the way. These pop-up help windows will keep you on track to write the best goal you can.
Step #1 - Crystallization - Crystallization is the first step in the goal setting process. This is where you capture the who, what, where, when, and how of your Goal. The answers to these questions help you develop the parameters, or boundaries, of the goal. All clearly written goals have boundaries to indicate where they begin and end. Clear parameters will help reduce conflicts and unnecessary overlaps of goal directed activity.
This step requires you, the goal setter, to project your thoughts into the future, creating a picture of what you want in as much detail as possible. The challenge is to "put your brains on paper". Quantity of information is important in this effort. You will draw from this reservoir throughout the rest of the process. This is a free wheeling exercise. Do not judge whether or not each idea is appropriate, just capture what you are thinking. There will be time later to evaluate the appropriateness of any given phrase, word, or paragraph.
Allow yourself uninterrupted time for this Step. In the Crystallization Text area provided, enter all your thoughts relative to quality, quantity, people, places, dollars, activities, events, dates, times, and all other elements of the goal you are trying to achieve. Include all of your senses to stimulate your thoughts. You may enter Crystallization text at any time until the goal is published and active. Click on the Save Step 1 button to record your crystallization thinking. After you have recorded your crystallization, the Crystallization section will turn green indicating that you have completed this step. However, you may return to this tab at any time to make additional changes.
Step #2 - Goal Statement - The Goal Statement is a sentence or set of phrases that describes exactly what you want to accomplish. Using the meaningful information you wrote in the crystallization step, it is time to structure a goal statement that will meet these five criteria:
- SPECIFIC
- MEASURABLE
- TANGIBLE
- REALISTIC
- CONTROLLABLE
Most goals begin with the word "To" followed by an action word such as create, develop, sell, generate, earn, buy, etc. The more concrete specifics you include in your statement, the clearer it will be and the more obvious your Obstacles/Challenges will become. Your action in this Step is to create a paragraph of a few sentences or phrases, or a series of specific bullet points which will embody the important aspects of your goal. Be very clear and specific here, so that anyone reading your goal statement will know exactly what you want to do.
In the Goal Statement text area provided, construct your goal statement. It may take a few revisions to shape the goal statement to meet the 5 criteria. Rewrites are a normal part of the process. At any time, you can click on the Save Step 2 button to save your goal statement.
If you have written the Goal Statement properly, you will find that it contains a driving force sentence or phrase that is the bottom line essence of the goal. This driving force phrase becomes your primary criterion for accomplishing the goal. The target of this primary criterion is the one number that, if achieved, tells you that you have accomplished the goal.
In the area below your goal statement, enter into the text fields all the data that describe your primary criterion. In the Description text field, clearly describe what the criterion is measuring. Enter in the Primary Target and the Actual Starting Point if you have one. Select the frequency at which you will record measurements from the Frequency drop down box. Then pick a date when you plan on recording your first measurement. For example, if you plan on reporting results on a monthly basis, then the last day of the month would be an appropriate day to choose. After you describe the units of the measurements and the number of decimals to be used to display the measurements, select a Target Type from the drop down box. There are four types of criteria:
- A Cumulative (Total) criterion is one in which results from each measurement period are added together, accumulating toward your goal.
- A Rate (Pace) criterion is one in which the average of the results from all measurement periods is recorded and compared to your target.
- A Ratio (Proportion) criterion is one in which results for a numerator and denominator from each measurement period are summed respectively, and the ratio of the two sums is recorded and compared to your target.
- A Percentage (%) criterion is one in which results are reported as a percent rather than just decimals (95.3% instead of 0.953)
Criteria Examples
At any time, you can click on the Save Step 2 button to save primary criterion. When you have written your goal statement and defined the primary criterion, the Goal Statement section will turn green indicating that you have completed this step. However, you may return to this tab at any time to make additional changes.
Thinking ahead: When you get to the Tracking step you will need to enter "Stretch" and "Unable" numbers for the Primary Criterion you just created. Keep this in mind while you are writing your Rewards & Benefits and working on the Planning steps so that you can enter realistic numbers.
Step #3 - Rewards & Benefits - The rewards and benefits are those things that accrue to you, your organization and others as a result of the achievement of your goal. The rewards and benefits must be EXCITING, MOTIVATING and CHALLENGING in order to be sure that you are working on a goal that is motivating to you. This step is where you make an important decision: to make it happen or to not make it happen.
Review your goal statement and begin thinking about the rewards and benefits of accomplishing your goal. To get started, ask yourself, "Why do I/we want this to happen?". "What will happen when I/we acheive this goal?". Both tangible and intangible terms are appropriate in this part of the process.
In the Rewards & Benefits text area, enter as many rewards and benefits as possible. Fill up this box!! There is no need to be specific here unless you care to. Things like personal satisfaction, peace of mind, feel good, are as valid as 5 volunteer hours/week, 3 pound weight loss per month, or promotion in six months to district manager. At any time you can click on the Save Step 3 button to record your Rewards & Benefits.
Immerse yourself in the positive results of accomplishing this goal. If you are lukewarm on the idea, or are yawning at the prospect of implementation and reaping the rewards, then you have a bright yellow caution signal staring you in the face. It may be indicating that this may not be a meaningful goal for you. If this is the case, go back to the Goal Statement and see if you can tweak it to make it more interesting and challenging for you. Then try to add more benefits and rewards, or different kinds of rewards that would have a more positive effect on you. These Rewards and Benefits need to be so high that they can be seen over the mountain of Obstacles and Challenges that you will meet.
When you have identified all your Rewards and Benefits the Rewards section will turn green indicating that you have completed this step. However, you may return to this tab at any time to make additional changes.
|
| Return to Top |
| |
| |
Step #4 - Obstacles/Challenges - This step begins the planning phase in which you layout the steps necessary to achieve your goal. The first part of this planning process is to identify and record those things that stand between you and your goal. Ask yourself, "Why don't I/we have it already?". These are the road blocks that must be overcome. Enter these road blocks into the text area. By default, this text area is pre-numbered. Enter the first obstacle/road block next to the 1. and the second obstacle/road block next to the 2. Numbering the road blocks facilitates identifying which solutions belong to which obstacles. Using this number sequence enter additional obstacles, challenges and road blocks until you are satisfied that you have identified all the things in the way of achieving your goal. You must click on the Save Step 4 button to record your road blocks.
Step #5 - Solutions - The second part of this planning process coming up with ways to overcome the obstacles and challenges you identified in the previous part. Record as many different Solutions as possible that you could use to overcome these road blocks. Enter these Solutions into the text area. By default, this text area is also pre-numbered in an outline format. Enter the first solution to the first obstacle next to 1a. and a second solution to the first obstacle next to 1b. Numbering the Solutions (1a. 1b. etc.) as they relate to the road blocks facilitates the connection between your obstacles and solutions. Using this numbered outline enter additional solutions to all obstacles/road blocks. Next, give your Solutions target dates by which you think the solution can be implemented. Then, from your list of solutions, pick a preferred one that you feel will be most effective and mark it as the Preferred Solution using any keyboard character (eg: *). At any time you can click on the Save Step 5 button to record your solutions. For the remaining time you are creating your goal, you may return to this section to make changes to your solution list.
Step #6 - Action Steps - This is the last part of the planning process. In order to implement the Preferred Solutions that you have identified, you will need to take specific action. The Action Steps section is the place to capture these activities. This becomes your task/to do list that will get you started on achieving your goal.
To add an Action Step to your To Do list, click on the Add button to bring up the Action Step Data Entry window. Enter in the Action Step item, select a due date for the Action Step to be completed and optionally enter in the initials of the person responsible to get it done. Click on the Save button to record the Action Step. The Action Step window will stay open for you to add additional Action Steps. Close the Action Step window by clicking on the Close Window button.
To edit an Action Step, click on the Action Step you wish to edit and then click on the Edit button. Make the changes in the Action Step Data Entry window and click on the Save Changes button.
To delete an Action Step, click on the action step you wish to delete and then click on the Delete button. Review the Action Step displayed in the Action Step Data Entry window and click on the Delete button to remove the Action Step from your To Do list.
Record as many Action Steps as you can for each preferred solution. Make sure that the first Action Step for each preferred solution is one which is entirely under your control and can be completed within 3 business days. This will get you off to a good start!
When you are finished with this step you will have a complete "To Do" list ready to display and print. To display the To Do list in a pop up window, click on the Display/Print To Do List button. You will be able to print the To Do List from this pop up window.
With your road blocks and solutions identified and at least one action step in your To Do list, the Action Steps section will turn green indicating that you have completed this step. If additional action steps become apparent during later steps in the goal setting process, you may return to this section and update your To Do List.
Step #7 - Tracking - The Tracking step is used to finalize your primary criterion and create other Measurable Criteria by which you will track the progress of your goal. The principle of "feedback" is critical when you implement a goal. You need to know how you are doing. You need a scorecard, or tracking system to help guide you along your path. By tracking your own progress with these measurable criteria you will be able to make adjustments sooner, rather than later, when you find yourself off-track or behind schedule.
|
| Finalize your Primary Criterion |
| |
You actually started the tracking process back in the Goal Statement step by creating the basics of the Primary Criterion. You must now finish that process by finalizing the definition of your Primary Criterion. To do that, highlight the Primary Criterion in the criteria list (if it is not already highlighted) and then click on the Edit this Criterion to display the criterion in the Criterion Data Entry window.
- Enter data into the "Stretch" and "Unsuccessful" fields above and below the overall Target field respectively. Note: You must enter data into the "Stretch" and "Unsuccessful" fields of the Primary Criterion to complete this step.
- Fill in the empty fields for the graph titles.
- If this criterion is a roll up criterion, select a Parent Criterion from the drop down box.
- If a Target Tolerance is appropriate, enter it now as a percentage. For example, enter 2.5 into the Target Tolerance text field to record a 2.5% Target Tolerance.
Click the Save Changes button to record the changes. You may edit criteria at any time prior to publishing the goal.
|
| Create Additional Criteria |
| |
With the Primary Criterion under your belt, you now have to complete this seventh step by creating at least one more measurable criterion. Begin by reviewing your Goal Statement and your Solutions for other potential measures that can be developed into measurable criteria.
To add a new measurable criterion to the list, click on the Add a Criterion button to bring up the Criterion Data Entry window. Each measurable criterion is comprised of a definition which describes what will be measured and how frequently. When the units and frequency of the measurement have been selected, choose a starting date when you will begin recording results (we suggest the end of a data collection period).
Caution: Using a Daily frequency requires you to enter a target for every day! This would be a lot of work for a 6 month or longer goal. Use this recording frequency judiciously.
Specify the number of decimals that you want to use to display the target and actual results fields.
Hint: To avoid confusion when displaying results, be sure to enter targets with the same number of decimals that you specified in the criterion description.
The Target Tolerance is the percent of the Target above and below the Target that determines the window in which a goal is considered met. If the criterion is a rollup criterion, select the parent criterion from the drop down box. It is also recommended that you enter the graph titles at this time. Finally, select the criterion type from the drop down box.
There are four types of criteria:
- A Cumulative (Total) criterion is one in which results from each measurement period are added together, accumulating toward your goal.
- A Rate(Pace) criterion is one in which the average of the results from all
measurement periods is recorded and compared to your target.
- A Ratio(Proportion) criterion is one in which results for a numerator and denominator from each measurement period are summed respectively, and the ratio of the two sums is recorded and compared to your target.
- A Percentage(%) criterion is one in which results are reported as a percent rather than just decimals (95.3% instead of 0.953)
Criteria Examples
When you have filled in all the required fields that are marked with a red asterisk, click on the Save button to record the criterion.
To edit an existing measurable criterion, click on the criterion that you wish to edit from the measurable criteria list, and then click on the Edit this Criterion button to bring up the edit window. Change any fields you want and click on the Save Changes button to save the changes.
To delete a criterion, click on the criterion that you wish to delete from the measurable criteria list, and then click on the Delete this Criterion button to bring up the delete window. This window will display the criterion you selected. Click on the Delete button to remove it from the list.
|
|
Rollup Criteria |
| |
A measurable criterion is considered a rollup criterion if the criterion supports a parent criterion, is itself a parent criterion or both. For example, consider a sales manager who created a goal that has a criterion that requires 10 new sales leads per week. This sales manager has 5 direct reports that each need to generate 2 new sales leads per week to satisfy that requirement. Each direct report creates their own "child" goal that has a "child" criterion which requires these 2 new sales leads. These 5 criteria along with the manager's criterion are considered Rollup Criteria.
If your rollup criterion is a child criterion that has no child criteria, then you will have to enter your measurements into the white text fields and click on the Record Actual Results button in the Results Management section. If your rollup criterion is a parent criterion, your results will automatically update from the child criteria when you click on the Record Actual Results button in Results Management.
|
| Enter Targets & Expectations |
| |
For each criterion, including the primary criterion, you must enter targets for each measurement date/period. Click on a criterion in the criteria list and then enter targets and/or expectations for each measurement date. Click on the Save Targets/Expectations button to record the data. Please note that if you choose to use the optional Stretch and Unsuccessful expectations for each period of a criterion, then all expectations must be filled in to complete the creation of the criterion. After the Targets/Expectations are saved, the total and average for each column are calculated and displayed under each column. Use this information/data to fine tune your Targets/Expectations to match the Stretch Overall Target and Unsuccessful fields for the Criterion.
If you have at least two criteria with all targets and/or expectations specified and the "Stretch" and "Unsuccessful" fields have been filled in for the Primary Criterion, then the Tracking section will turn green indicating that you have completed this step. As you continue to create your goal, you may return to this tab and modify your list of criteria.
Tip: If you have a criterion with a daily or weekly frequency you have a lot of targets and expectations to key in! If many of these targets are the same number, then after you enter the first number, highlight the number and copy it. Then use the Tab button to move to the next period that has the same target and paste the number into the text field. Continue the tab-paste sequence until all periods needing the number have been filled in.
Step #8 - Affirmations - Affirmations, or self-talk as it is sometimes called, are powerful motivators for achievement. This applies to groups as well as individuals. Entire companies have become "#1" by committing to make it happen, and having an affirmation/motto of "We are #1!". Before you skip this step and pooh-pooh it, keep in mind many people fail to reach their goals because they don't believe, deep down inside, that they can! Since you are trying to improve your goal achievement percentage, use every advantage you can. Affirmations give you an edge, first on the inside, then on the outside. Try them. Use them. Master this Step. Goal achievement can be more enjoyable and attainable if you do.
It is important to follow the rule of only stating POSITIVE affirmations. Double check what you wrote. Make sure each and every statement is POSITIVE! Print them out or copy them on 3" x 5" cards or sticky notes and put them in several places so you can review them periodically throughout the day.
Write your Affirmations in the text area to get you psyched to accomplish your goal. Click on the Save Step 8 button to record your affirmations. When you have recorded your affirmations the Affirmations section will turn green indicating that you have completed this step. At any time during the creation of your goal, you may use this section to capture additional affirmations.
Step #9 - Resources - This is the final step in the Goal creation process. Here, you will identify those resources that are available or needed to accomplish your Goal.
We do not live in a vacuum. We interact with and depend on other people and entities (colleagues, employees, friends and family) while we pursue our goals. These organizations, groups, people, tools, bodies of knowledge and environments become resources for us.
There are many types of Resources such as equipment, certain technologies, material, special processes and cash to consider and build into your support system along with the people component. These types of Resources may be just as critical to your success.
This is the place to capture information relative to what is available and what you will need to implement your various solutions, take your action steps, and ultimately achieve your goal. In this area type in the names of people who will be involved, time frames, dollars, knowledge, skills, experience and equipment.
Into the text areas provided, type the Resources Available and Resources Needed to achieve your goal. Click on the Save Step 9 button at any time to record your Resources text. At any time during the goal creation process, you may use this section to make additional entries into the Resources Available and Resources Needed text areas.
When you have recorded your Resources Available and Resources Needed text, the
Resources section will turn green indicating that you have completed this step.
|
|
Committing to your Goal |
| |
When you have completed all of the nine steps described above, all of the goal setting sections will be green and the Commit to this Goal button will appear at the top of the goal. Review all the data you have entered for each of the steps to ensure that your goal is well written and ready for execution. When you are satisfied with the goal the way it is written, click on the Commit to this Goal button to send your goal to Results Management for tracking.
|
|
Other Capabilities
|
| |
There are four additional buttons available to you while you are creating your goal.
- Print Goal
- Annotations
- Export Goal
- Delete Goal
These links are described above.
|
|
Results Management |
| |
You have committed yourself to accomplishing this Goal. Now it is time to Make It Happen!!.
This page contains a list of your Goals that you have committed to. These are your active goals that you track by entering your actual results vis-a-vis the targets and expectations you set when you created the goal. To record the actual performance results for a criterion of your goal, follow this simple four step process shown on this page.
Step #1: Click on the radio button in the "Select" column next to the goal for which you wish to record results. The measurable criteria for the goal will be shown in the grid below the goal list on the left hand side.
Step #2: Click on a criterion in the list to expose the targets, expectations and
previously recorded performance results in the grid on the right.
Step #3: Enter actual results into the white text fields. If there are no white text fields then this is a rollup criterion (see roll up criteria above), and you can skip this step and go to Step 4. Your results will be automatically gathered from your child criteria and recorded when you perform Step #4.
Step #4: Click the Record Actual Results button to save the data.
Optional:: If desired, click on the Graph this Criterion button to
present your results in graphical form.
Compare your actual result to your target and expectations to see where you stand. There are indicators in the Criterion List as well as the data grid to help you understand how you are doing. Below is a key that describes these indicators:
Cumulative and Ratio Target Type Criterion Indicators
|
Performance To Date Indicators
|
| |
 - Your performance to date is ahead of your target to date for the criterion. - Your performance to date is ahead of your target to date for the criterion.
 - Your performance to date is behind your target to date for the criterion. - Your performance to date is behind your target to date for the criterion.
 - Data is missing in at least one period. - Data is missing in at least one period.
|
Overall Performance Indicators
|
|
 - Your performance to date is ahead of your end-date target for the criterion. - Your performance to date is ahead of your end-date target for the criterion.
 - Your performance to date is behind your end-date target for the criterion. - Your performance to date is behind your end-date target for the criterion.
|
Rate and Percentage Target Type Criterion Indicators*
|
* Due to the non-cumulative nature, complexity and number of choices available for using rate and percentage type criteria, we cannot provide a simple overall performance indicator. We can only accurately show the current period performance against the current period target.
|
| |
 - Your performance for the current period is ahead of your target for the current period. - Your performance for the current period is ahead of your target for the current period.
 - Your performance for the current period is behind your target for the current period. - Your performance for the current period is behind your target for the current period.
 - Data is missing for at least one period, but your last recorded performance was ahead of your target for that period. - Data is missing for at least one period, but your last recorded performance was ahead of your target for that period.
 - Data is missing for at least one period, but your last recorded performance was behind your target for that period. - Data is missing for at least one period, but your last recorded performance was behind your target for that period.
|
Period Indicators
|
| |
 - Your performance for this period is ahead of the target for this period. - Your performance for this period is ahead of the target for this period.
 - Your performance for this period is behind the target for this period. - Your performance for this period is behind the target for this period.
 - The data is missing for this period. - The data is missing for this period.
|
Other Indicators
|
| |
 - The Goal is still in creation. - The Goal is still in creation.
|
If you have goals that require a lot of tracking, you may be wondering how you will keep all the measurement due dates in your head so you won't forget to enter in your actual results in a timely manner. Not to worry... GoalTrak PV will keep track for you!
Once each day, the first time you sign in, GoalTrak PV will scan your goals and look for measurements that are due or past due. If there are measurements due or past due, then GoalTrak PV will open up the Measurement Due window and display of list of those goals that have criteria that need a measurement recorded. Click on a goal in the list and a window will be redirected to the Results Management page with the goal and criterion pre-selected. Just enter in your actual result and click on the Record Actual Results button to save the data and redirect the window back to the Measurement Due window so you can do another one. Continue this process until all the criteria in the list have disappeared.
Ocassionally, a goal with a rollup criterion will not disappear after you click on the Record Actual Results button. This may happen for several reasons:
- The Actual Results for the child criterion may not have been updated by the goal owner.
- The Goal containing the child criterion is not a published, active goal.
- Your criterion is looking for data prior to the "Start Data Collection On" date of the child criterion.
When you are done recording measurements, click on the Close button to close the window.
|
| |
If that is not enough for you, you can direct GoalTrak PV to send you an email when you have a measurement due or past due. |
|
To Do List |
| |
For your convenience, GoalTrak PV provides you with a list of all of the Action Steps you have created. This Master To Do List contains Action Steps that you made when you created your goals as well as any that you added subsequently. On this page you can also add action steps that are not tied to a goal.
On this page you can:
- View your "To Do" List
- Add an Action Step to your "To Do" List
- Edit an Action Step
- Change the Status of an Action Step
- Delete an Action Step
- Print your "To Do" List
- Export your "To Do" List
View your "To Do" List - Use your To Do List to keep a list of all your Action Steps in front of you while you are accomplishing your Goals.
Add an Action Step - Click on the Add button to add an Action Step. A data entry window will open. Enter in a description of the Action Step, the status of the Action Step, when it's due, who's responsible and which goal the Action Step applies to if appropriate. Required fields are marked with a red asterisk. Click on the Save button to record the Action Step.
Edit an Action Step - To change the status of an Action Step or edit it in some other way, click on the Action Step in the list and then click on the Edit button. In the data entry window that opens, make any changes to the Action Step that you want. Remember that required fields are marked with a red asterisk. Click on the Save Changes button to record the changes.
Delete an Action Step - To remove an Action Step from the list, click on the Action Step in the list and then click on the Delete button. A window will open displaying all the information of that Action Step. Ensure that this is the Action Step you wish to delete and click on the Delete button to delete the Action Step.
Print your "To Do" List - To print out your list of Action Steps in a "To Do" list, click on the Print To Do List button. A window will open up showing the To Do list. Click on the printer icon to print the window. The print dialog box will open allowing you to select a printer and other options.
Export your "To Do" List - To export your list of Action Steps to third party
programs outside of GoalTrak PV, like Lotus Notes™ or Microsoft Outlook™ select an output format from the drop down box next to the Export To Do List button and then click on the Export To Do List button. This will generate a .csv format file. Follow the download instructions saving the file to your hard drive. To import this file into another application, follow the directions provided by that application for importing the file. Here are a few applications into which you might want to import your To Do list.
|
|
Lotus Notes™
|
|
Microsoft Outlook™
|
|
Microsoft Excel™
|
|
Act!
|
|
Goldmine
|
|
Sample Goals |
| |
To help those who are new to goal setting, we have included three sample goals for you to review. Click on the goal phrase of a sample goal to view it.
|
| |
|
|